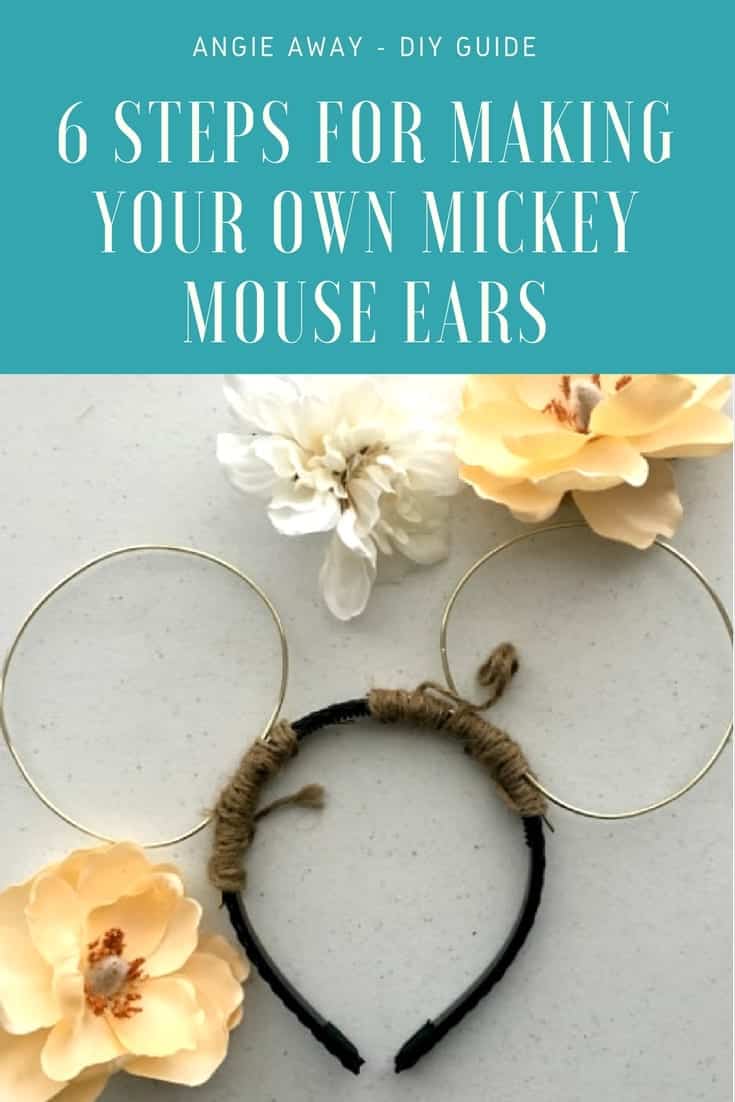
Hey everyboyd – it’s Rae! I wanted to share something neat I learned to do, making my own DIY Mickey Mouse Ears.
When I’m not traveling, I’m usually at the theme parks (duhhh). It’s probably my favorite thing about living in Orlando. I remember when I was little my family would plan a trip to Disney MONTHS in advance. Now I wake up and think, “It’s a pretty nice day, might as well go to Disney World.”
Naturally, you’ll want to be a fashionable little mouse at WDW, and sure, you can spend $30+ on the generic rose gold ears that Disney sells for an absurd markup and everyone has. Or you can make your own totally unique pair of Mickey Mouse Ears for waaaay cheaper.
DIY Mickey Mouse Ears: An Easy Step by Step Guide
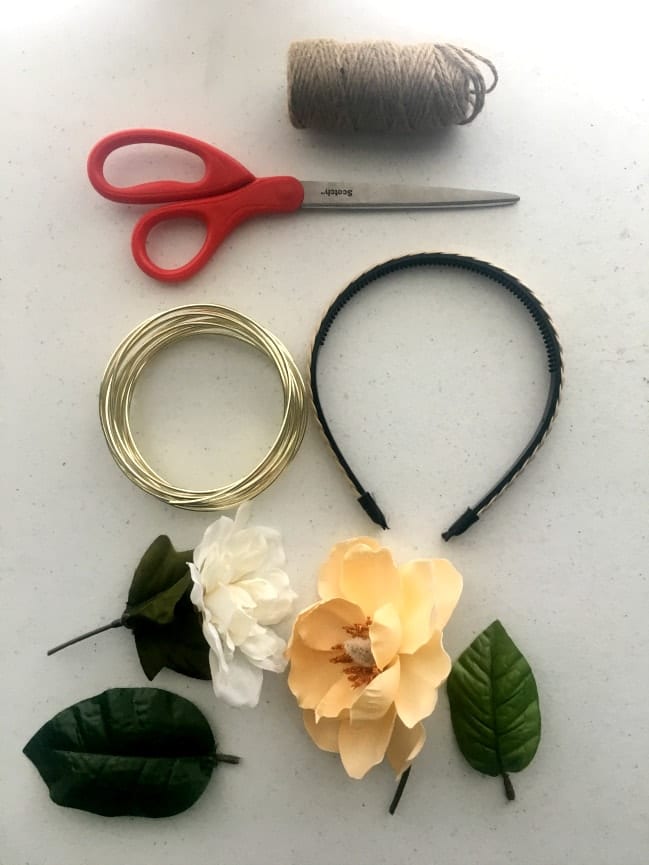
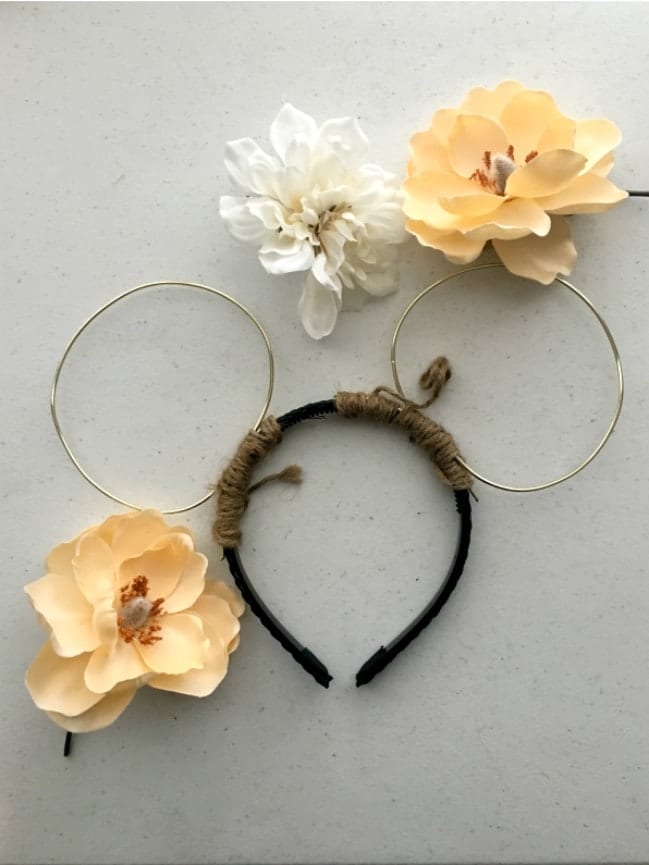
Step 1: Pick out flowers/materials
You will need:
a simple headband
1 spool of twine
1 pack of wire (gold, black, etc.)
A few fake flowers
Wire cutters (I used scissors and would not recommend that route!)
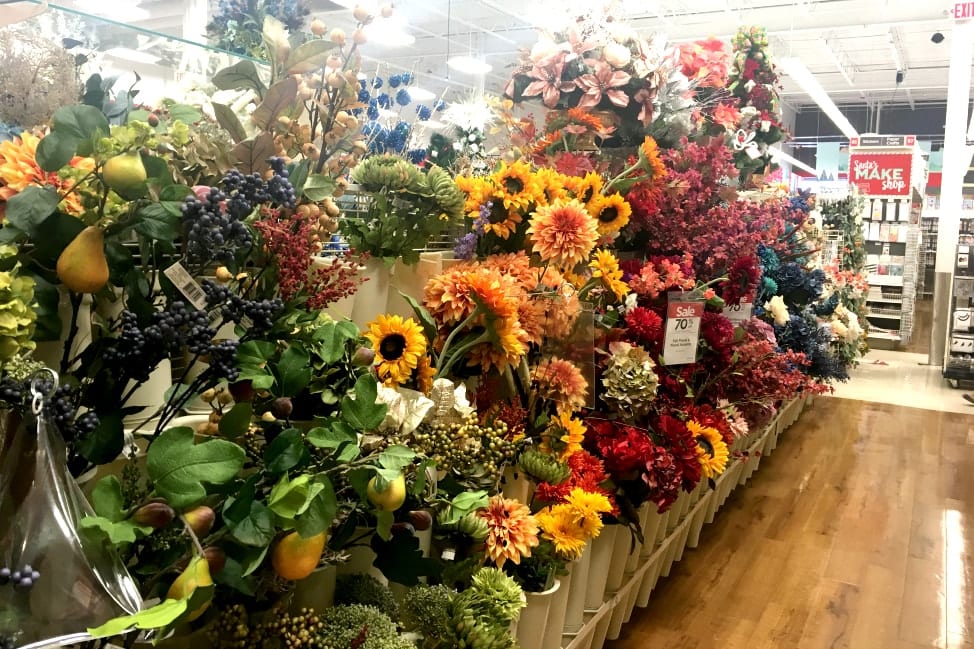
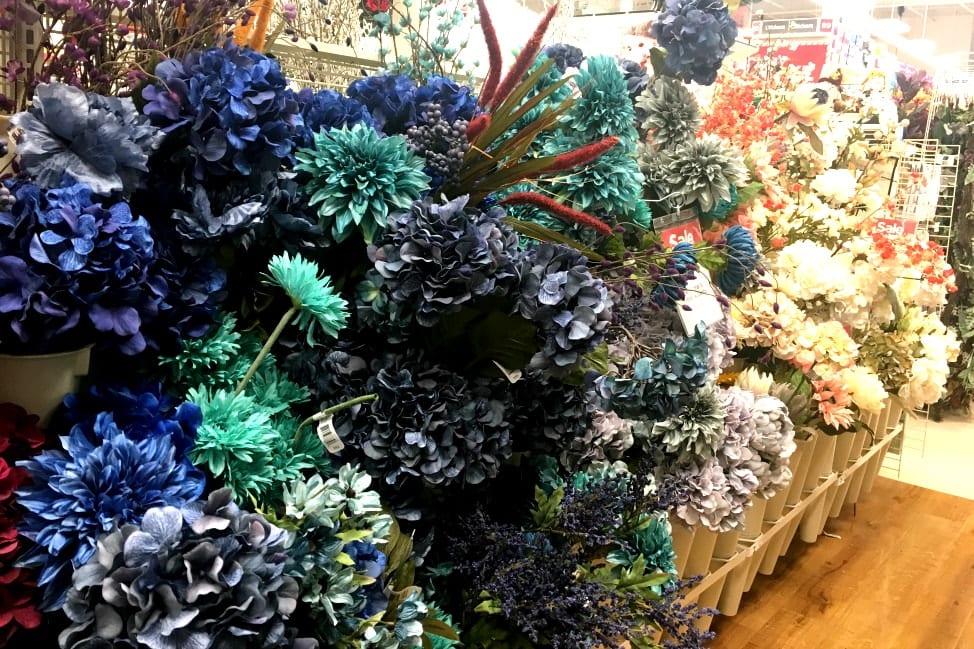
Type of Flowers to Use
The hardest part of this whole process was deciding what type of flowers I wanted to use. Should I do all one color? Maybe purple? Ahhh how about all sunflowers! Yes! Wait, no…Maybe I could try a winter theme? Ohhhh I could add spiderwebs for Halloween!
Annnnnd it’s been 45 minutes. Great.
I got my flowers from Michael’s, but here are some other stores that carry flowers: Hobby Lobby, Joann Fabric and Craft Store, Walmart, even the Dollar Store!
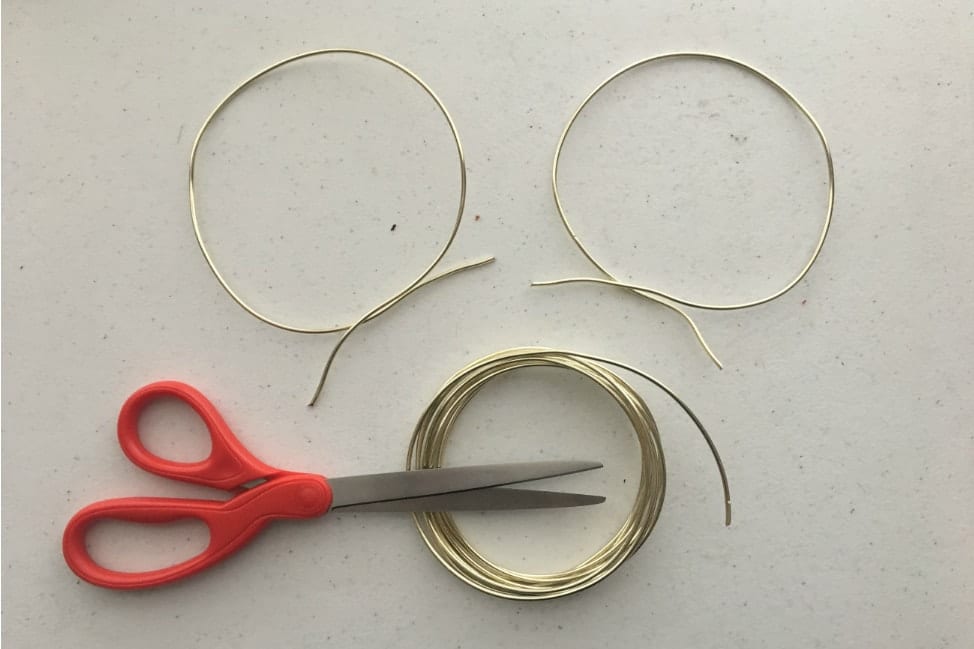
Step 2: Cut 8-10 inches of wire
Use your wire cutters to cut 8-10 inches of wire and bend into a circle (repeat for second ear). Don’t panic if there are little bumps or if the wire is uneven, you’ll be fixing that at the end.
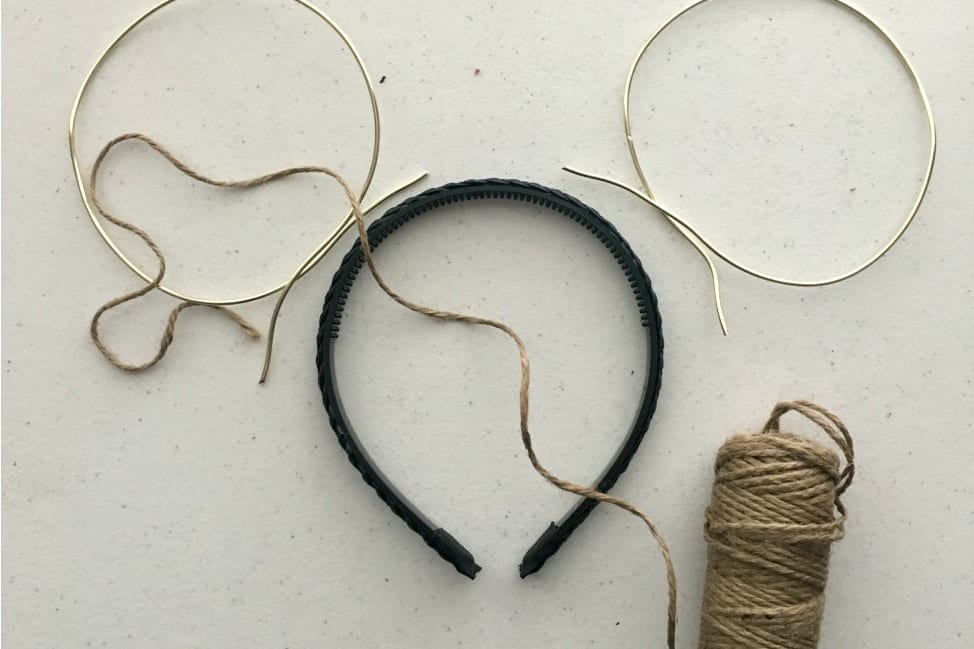
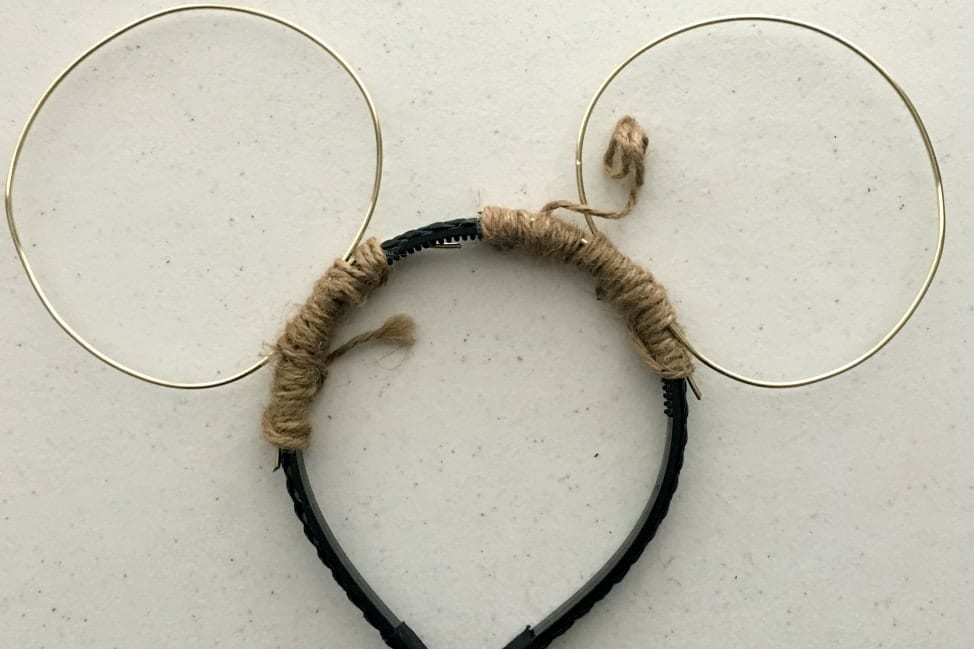
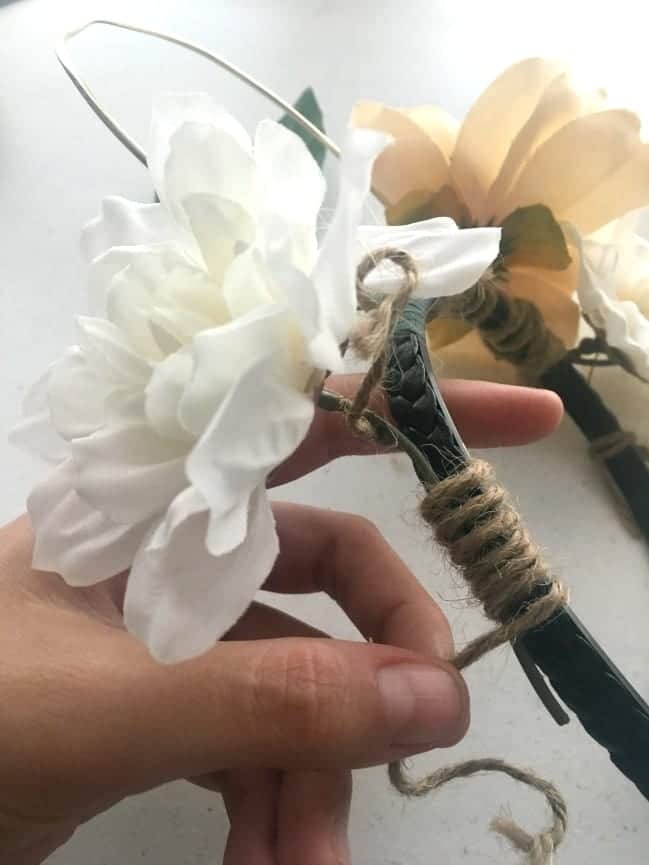
Step 3: Use twine to wrap the write to a headband
This doesn’t need to be super neat, but it does need to be tight!
Step 4: Add flowers
Cut the flower stem so you have 1-2 inches to work with. Use the twine to wrap the stems to the headband. Tie off the twine behind the flower after you’ve completely covered the stem.
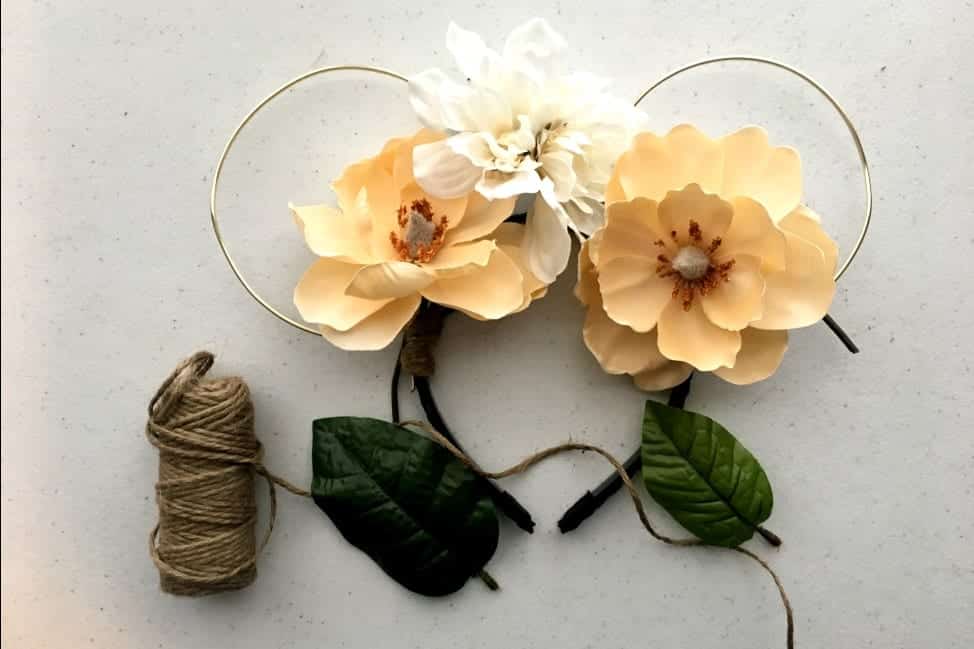
Step 5: Add leaves
After the flowers are wrapped into place, it’s time to add the leaves. The leaf stems are not as long as the flower stems, so make sure to wrap them super tight or you will have leaves flying off your head!
Step 6: Wrap the headband completely
Use the twine to wrap the rest of the headband. Cover any stems you may have missed and tie off the knot behind the flowers. This is where you can finally smooth out the bumps in the wire, YAY! You can use a cloth or a t-shirt for smoothing.
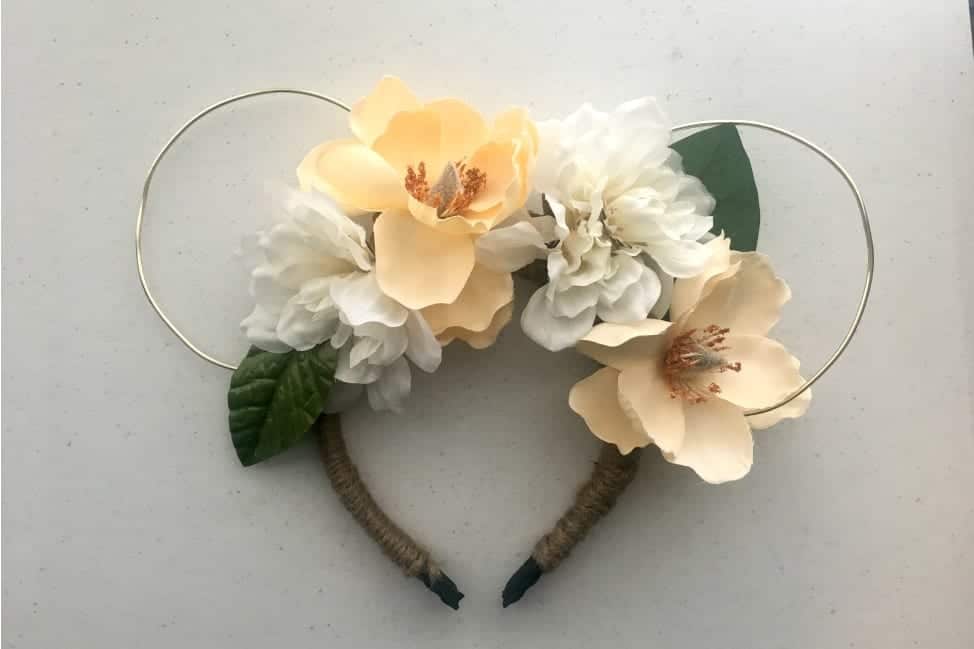
Step 7: TAAADAAAAHHHHH! Rock your unique DIY Mouse Ears
You’ll have people asking where you got your Mickey Mouse Ears and you get to say, “I’m really cool I made them and they look better than yours. Thanks! I made them myself!” You can expect to pay anywhere from $10 to $30 (depending on if you already have the materials listed). If the only materials you need are flowers, you shouldn’t spend more than $10!
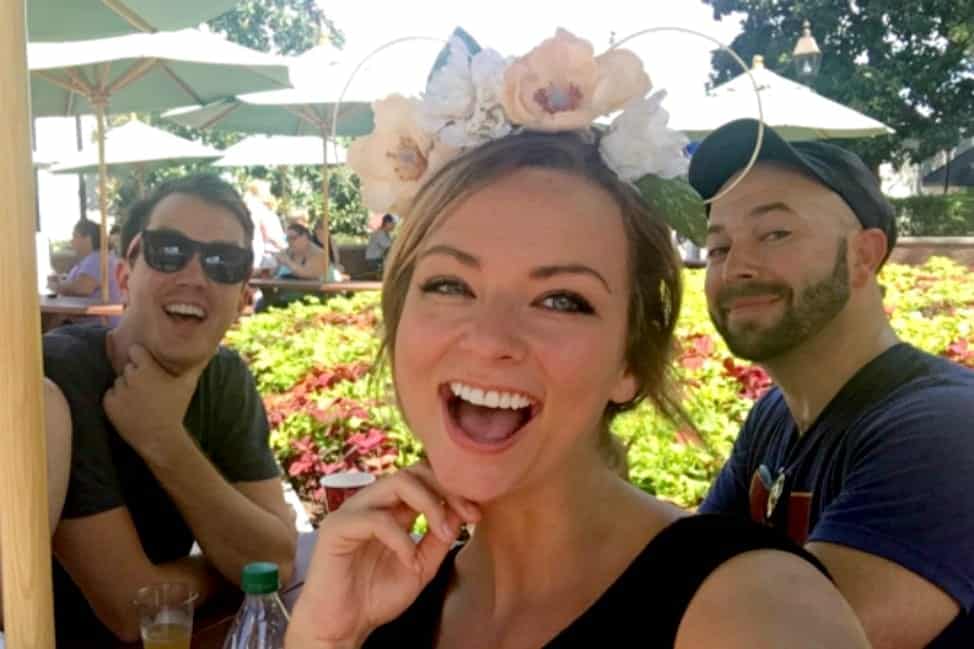
I wore mine to Epcot’s Food and Wine Festival, but I really should have made more for Taylor and Brian (below). Don’t they look like they need some DIY Mickey Mouse Ears too? 😉